Right then, let’s talk orangeries and outbuildings! I’ve spent a fair chunk of time buried in building regs, material costs, and enough planning application forms to wallpaper a small cottage. And honestly, the most daunting part for many is figuring out the finances. So, let me share my experience of navigating the cost analysis and budgeting minefield – hopefully, it’ll save you a few headaches (and pounds!).
Phase 1: The ‘Dream’ Budget
It all starts with a vision, doesn’t it? But visions, sadly, don’t come cheap. Before even thinking about builders, I created a ‘dream’ budget. I looked at pictures in magazines, online portfolios, and imagined the absolute best-case scenario: the finest materials, underfloor heating, bespoke joinery – the works. I wrote down everything I could think of: the type of structure, approximate size, desired features, and the high-end materials I drooled over. I then used online calculators (there are plenty specific to orangeries and extensions in the UK) and contacted a few companies for ballpark estimates. This figure was scary, but important. It’s your aspirational cost ceiling.
Actionable Step: Don’t be shy! Get those initial quotes. Websites are helpful, but a few phone calls to local contractors will give you a much more realistic starting point.
Phase 2: Reality Bites: The Realistic Estimate
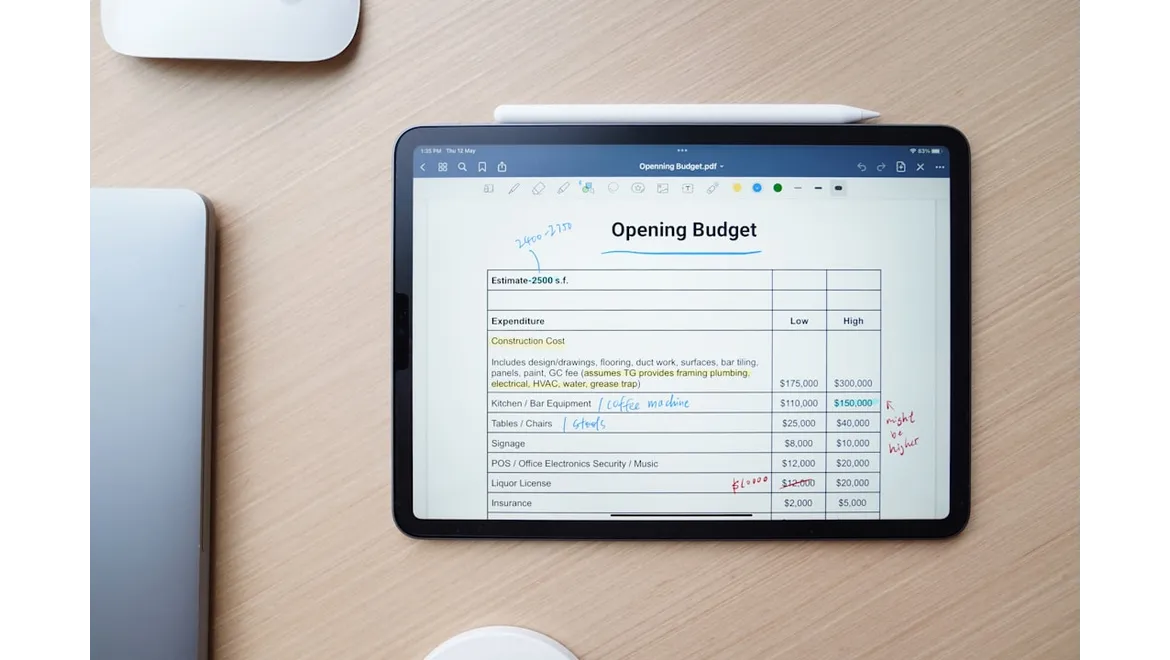
Okay, now it’s time for a dose of reality. My ‘dream’ budget needed some serious trimming. This involved a deep dive into materials. Those beautiful hardwood frames? Gorgeous, but pricey. Could I achieve a similar aesthetic with a high-quality engineered wood or even a carefully chosen uPVC that mimics timber? This stage involves trade-offs. I created a spreadsheet with three columns: ‘Dream’, ‘Mid-Range’, and ‘Budget’. Each material, fixture, and fitting was listed, and I assigned a cost estimate to each column. I factored in things like foundations (soil surveys can be expensive!), brick matching (especially crucial for listed buildings), roofing materials (tiles or slate?), glazing (double or triple?), internal finishes (plastering, painting, flooring), electrical work (lighting, sockets), plumbing (heating, potential water supply), and planning permission fees.
Actionable Step: Break down every aspect of the project. From the screws to the scaffolding. The more granular your list, the more accurate your overall estimate will be.
Phase 3: Contingency is King (or Queen!)
Trust me on this one: always add a contingency. I initially added 10%, but after reading horror stories online, I bumped it up to 15%. Building projects rarely go exactly to plan. Unexpected problems will arise: hidden pipes, dodgy foundations, delays caused by bad weather, price increases for materials… the list is endless. That contingency fund is your safety net.
Actionable Step: Resist the temptation to dip into your contingency unless absolutely necessary. Treat it as sacred money for unforeseen circumstances.
Phase 4: Cost-Saving Opportunities: Where to Trim the Fat
Finding savings is a balancing act. You don’t want to compromise on quality (especially damp-proofing and structural integrity!), but there are areas where you can potentially save money.
- Materials: Explore alternative materials, as mentioned above. Salvaged materials can be a good option, but ensure they meet building regulations and are in good condition.
- DIY (Carefully!): Consider what tasks you can realistically handle yourself. Painting and decorating are obvious candidates. But be honest about your skill level. Botched DIY can end up costing more in the long run. I did some of the painting myself, but left the plastering to the professionals.
- Phased Approach: If budget is really tight, consider a phased approach. Focus on getting the structure watertight first, and then tackle the internal finishes later.
- Shop Around: Get multiple quotes from different contractors. Don’t just go for the cheapest – consider their experience, reputation, and references. A good builder who charges slightly more can often save you money in the long run by avoiding mistakes and delays.
- VAT Relief: Investigate if you qualify for VAT relief. Certain types of work (e.g., converting a derelict building) may be eligible.
Actionable Step: Be ruthless in prioritising. What features are essential, and what are simply ‘nice to haves’? Focus on the essentials first.
Phase 5: Managing the Budget: Stay on Track
Once you have a realistic budget, stick to it! This requires careful monitoring of expenses. I set up a spreadsheet to track every payment, comparing it to the original estimate. I also maintained regular communication with my builder to discuss any potential overspends or unexpected costs.
Actionable Step: Keep meticulous records of all invoices and receipts. Regularly review your budget and make adjustments as needed. And remember, communication is key! Talk to your builder openly and honestly about any concerns you have.
Ultimately, budgeting for an orangery or outbuilding is about balancing ambition with reality. It’s a challenging but rewarding process. By carefully planning, researching, and managing your finances, you can turn your dream into a beautiful and valuable addition to your home.